
Qt Creator 中交叉编译 Qt 程序
概要:本文详细介绍了如何在 x86 主机上使用 Qt Creator 交叉编译 Qt 程序,并部署到 ARMv8 架构的目标设备上运行。内容涵盖 Qt Creator 的安装、交叉编译套件的配置、以及实际的 Qt 项目编译流程,适用于已完成 Qt 库交叉编译并部署的用户。
[TOC]
1. 简介
本文用于说明如何在 x86 主机的 Qt Creator 中交叉编译出可以在 ARM 板上运行的 Qt 程序。
1.1 开发环境
- 主机:x86 架构,Ubuntu 20.04.06 系统
- 目标机器:ARMv8 架构,Ubuntu 20.04 系统
适用于已在主机上交叉编译 Qt 库并部署到目标设备的情况
2. 文章结构
- Qt Creator 的安装
- 如何在 Qt Creator 中配置交叉编译套件
- 使用 Qt Creator 实战交叉编译 Qt 程序
3. Qt Creator 的安装
3.1 下载并赋予执行权限
wget https://download.qt.io/archive/online_installers/4.6/qt-unified-linux-x64-4.6.0-online.run
chmod +x qt-unified-linux-x64-4.6.0-online.run
3.2 安装缺失依赖
sudo apt-get install libxcb-xinerama0
3.3 注册 Qt 账户
注册地址:https://www.qt.io/
3.4 启动安装程序(使用阿里源加速)
sudo ./qt-unified-linux-x64-4.6.0-online.run --mirror https://mirrors.aliyun.com/qt
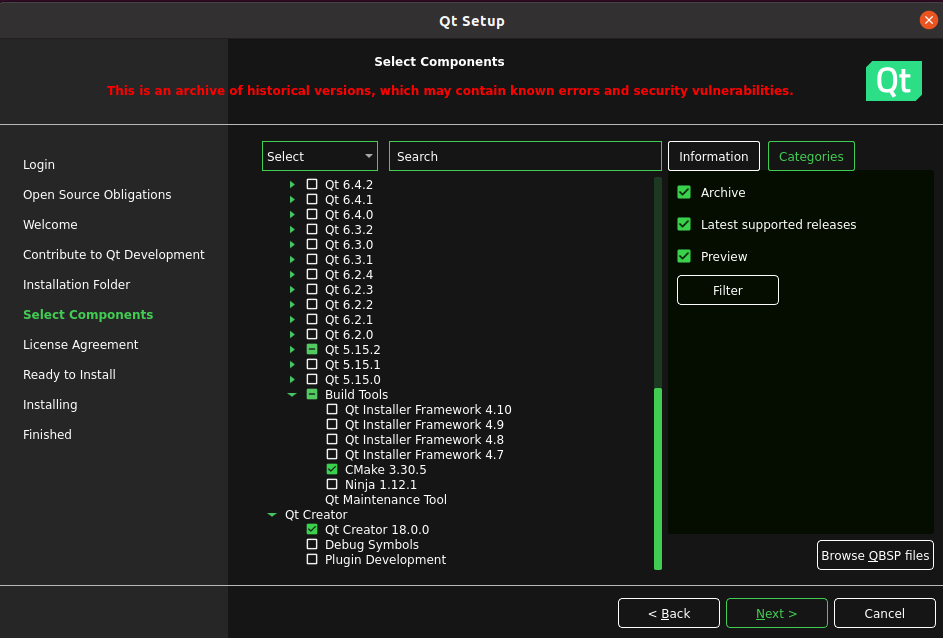
需要登录 Qt 帐号,然后根据提示逐步安装组件。
3.5 安装建议
- 避免安装 Android 相关内容(占用空间大)
- Qt 版本随意选择一个(示例中为 5.15.2)
安装界面示意图:
4. 如何在 Qt Creator 中配置交叉编译套件
4.1 架构概述
交叉编译套件包含以下要素:
- Qt 版本(qmake)
- 编译器(如 aarch64)
- 目标设备的根文件系统(sysroot)
在项目创建时可选择此套件,完成编译。
4.2 Qt 版本配置与根文件系统挂载
4.2.1 目标
为了使交叉编译生成的 qmake 正常工作,需在主机上建立与其内部硬编码路径一致的目录结构,并将资源放置其中或通过软链接连接。
4.2.2 为什么这样做
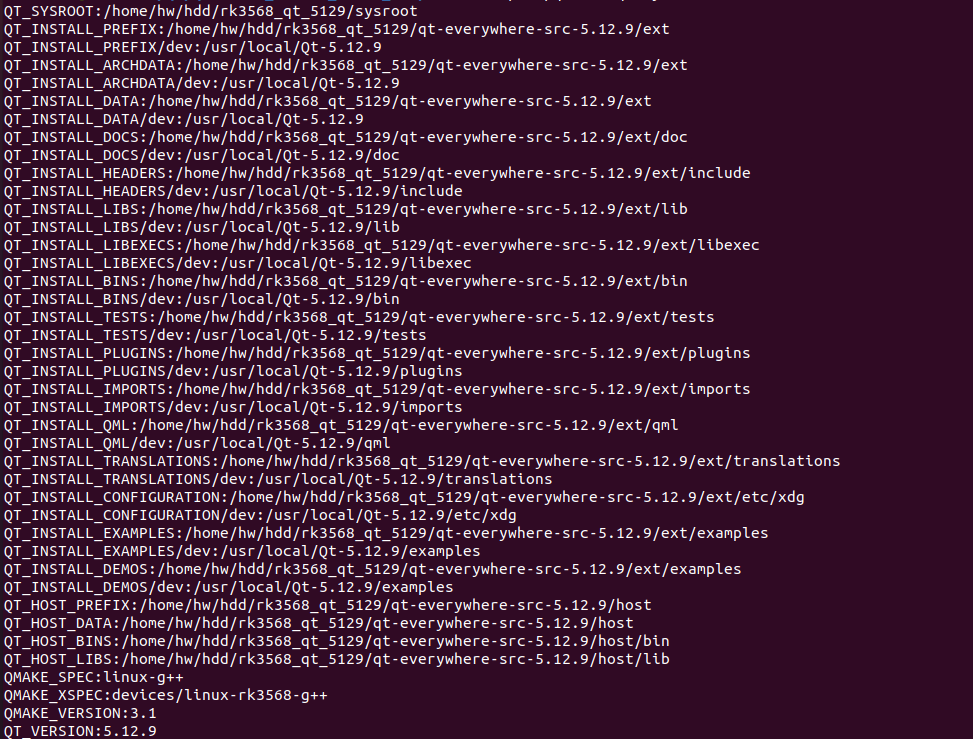
使用如下命令查看 qmake 硬编码路径,这些路径是在编译库是configure配置的,使用的都是硬编码的绝对路径,无法修改,实际使用qmake时,qmake会在这些路径下寻找各种工具,如果实际路径和这些路径不一样,便无法编译成功:
host/bin/qmake -query
路径分类:
- ext:目标端 Qt 库路径
- host:主机编译工具路径(qmake、mkspecs)
- sysroot:目标设备根文件系统
示意图:
4.2.3 核心思想
在主机上建立与 qmake 硬编码路径一致的目录层级,然后把交叉编译生成的 Qt 库(目标端文件)放到 ext,把主机端的编译工具放到 host,把目标根文件系统挂载到 sysroot。因为原始路径位于 /home 下可能会遇到权限问题,建议在当前桌面用户可写的目录下建立一个顶层目录(例如 rk3568_qt5129_X),再用软链接把它挂到 /home/hw/ 下,这样既能保留期望的绝对路径,又避免直接在 /home 下操作权限问题。
4.2.4 推荐步骤
步骤 1:创建目录结构
在启动Qt Creator用户的有写权限的目录下创建工作目录结构:
mkdir -p ~/rk3568_qt5129_X/rk3568_qt_5129/qt-everywhere-src-5.12.9/{host,ext}
mkdir -p ~/rk3568_qt5129_X/rk3568_qt_5129/sysroot
步骤 2:解压 Qt 库与工具
将提供的目标端 Qt 库和主机端工具分别解压到对应目录下:
- ext:包含 bin、lib、include 等
- host:包含 bin、lib、mkspecs
目录结构示例:
.
├── ext
│   ├── bin
│   ├── lib
│   └── ...
└── host
    ├── bin
    ├── lib
    └── mkspecs
步骤 3:创建软链接到 /home/hw/
sudo mkdir -p /home/hw/
sudo ln -s /path/to/rk3568_qt5129_X /home/hw/
这样 qmake 看到的硬编码路径 /home/hw/rk3568_qt_5129/… 就会被指向到实际准备好的目录树。
步骤 4:挂载目标设备根文件系统
sudo mount <根文件系统镜像或设备路径> /path/to/rk3568_qt5129_X/rk3568_qt_5129/sysroot
示例:
sudo mount /path/to/rootfs.img /path/to/rk3568_qt5129_X/rk3568_qt_5129/sysroot
步骤 5:检查验证
检查该命令输出的路径是否与上面配置的路径正确对应:
/home/hw/rk3568_qt_5129/qt-everywhere-src-5.12.9/host/bin/qmake -query
主要是ext、host、sysroot三项路径。
4.3 编译器安装
安装 x86 编译工具链
sudo apt-get install gcc g++
sudo apt-get install lsb-core lib32stdc++6
安装 ARM 交叉编译器
sudo apt update
sudo apt install gcc-aarch64-linux-gnu
sudo apt install g++-aarch64-linux-gnu
检查版本
/usr/bin/aarch64-linux-gnu-gcc --version
/usr/bin/aarch64-linux-gnu-g++ --version
/usr/bin/aarch64-linux-gnu-ld --version
/usr/bin/aarch64-linux-gnu-ar --version
版本信息如下:
witheart@ubuntu:~$ /usr/bin/aarch64-linux-gnu-gcc --version
aarch64-linux-gnu-gcc (Ubuntu 9.4.0-1ubuntu1~20.04.2) 9.4.0
Copyright (C) 2019 Free Software Foundation, Inc.
This is free software; see the source for copying conditions.  There is NO
warranty; not even for MERCHANTABILITY or FITNESS FOR A PARTICULAR PURPOSE.

witheart@ubuntu:~$ /usr/bin/aarch64-linux-gnu-g++ --version
aarch64-linux-gnu-g++ (Ubuntu 9.4.0-1ubuntu1~20.04.2) 9.4.0
Copyright (C) 2019 Free Software Foundation, Inc.
This is free software; see the source for copying conditions.  There is NO
warranty; not even for MERCHANTABILITY or FITNESS FOR A PARTICULAR PURPOSE.

witheart@ubuntu:~$ /usr/bin/aarch64-linux-gnu-ld --version
GNU ld (GNU Binutils for Ubuntu) 2.34
Copyright (C) 2020 Free Software Foundation, Inc.
This program is free software; you may redistribute it under the terms of
the GNU General Public License version 3 or (at your option) a later version.
This program has absolutely no warranty.

witheart@ubuntu:~$ /usr/bin/aarch64-linux-gnu-ar --version
GNU ar (GNU Binutils for Ubuntu) 2.34
Copyright (C) 2020 Free Software Foundation, Inc.
This program is free software; you may redistribute it under the terms of
the GNU General Public License version 3 or (at your option) any later version.
This program has absolutely no warranty.
4.4 配置 Qt Creator 套件
- 打开 Qt Creator → 编辑 → 首选项 → 构建套件(Kit)
- 添加 Qt 版本(从软链接路径下进行选择,host/bin/qmake)
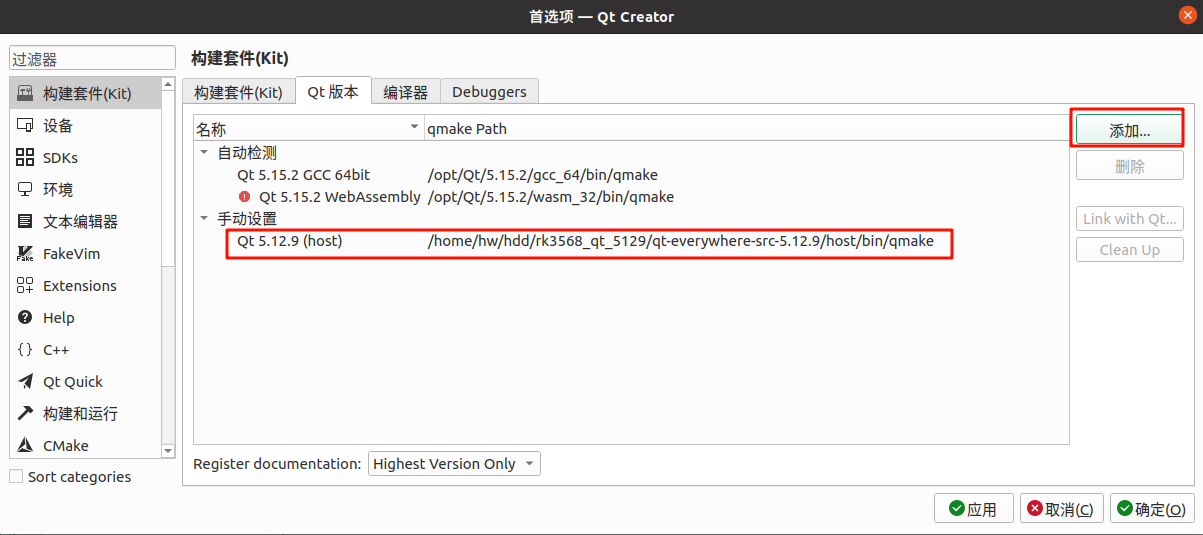 如果qt版本配置正确,则不会显示红色感叹号
 - 编译器配置(如果交叉编译器正确安装,Qt Creator 可自动识别)
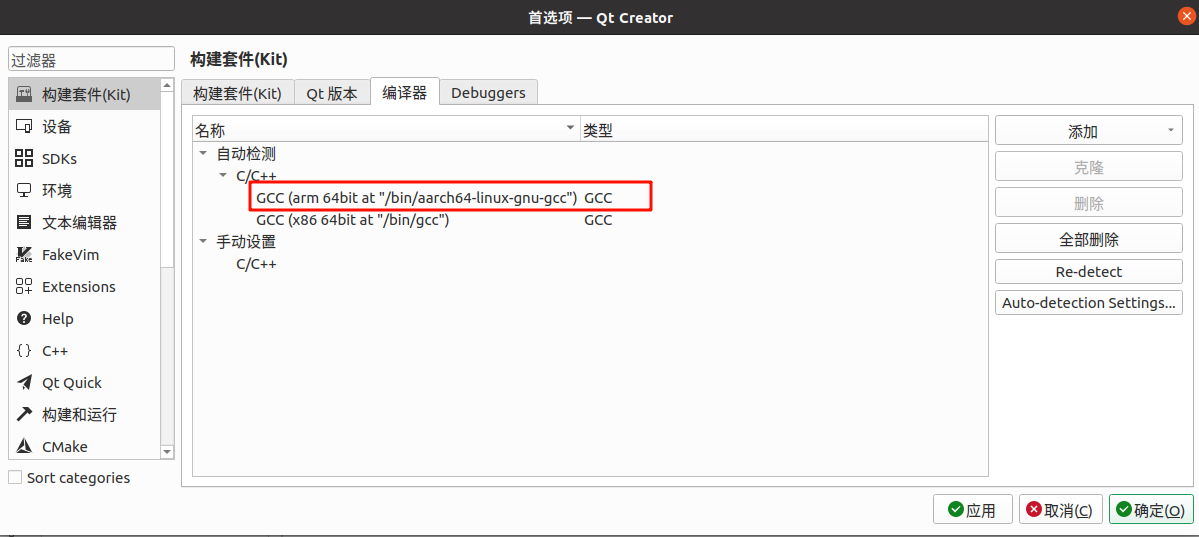
- 创建构建套件,选择对应 Qt 版本与编译器
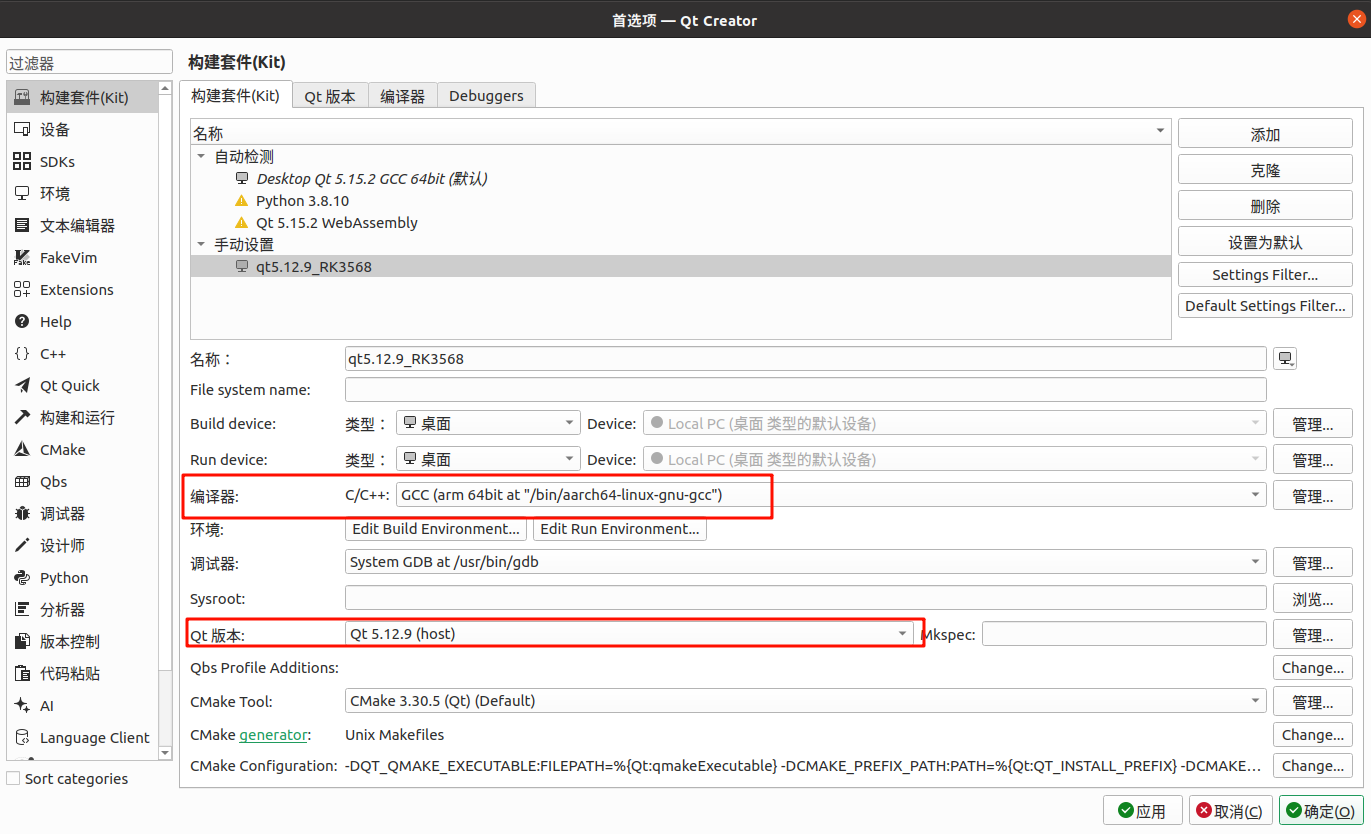
注意:sysroot 无需手动填写,qmake 会使用内部路径
- 点击“应用” → “确定”,套件无黄色感叹号即配置成功
5. 使用 Qt Creator 实战交叉编译 Qt 程序
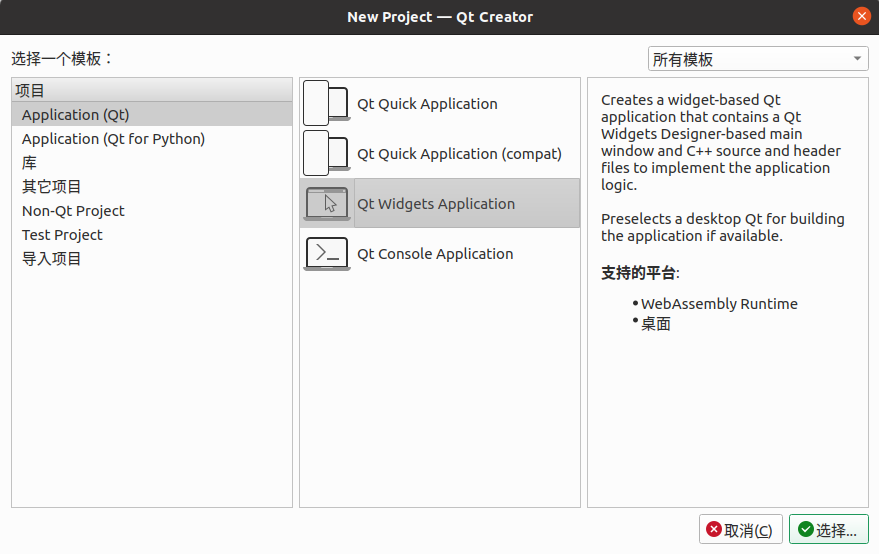
- 打开 Qt Creator → New Project…
- 选择 Qt Widgets Application
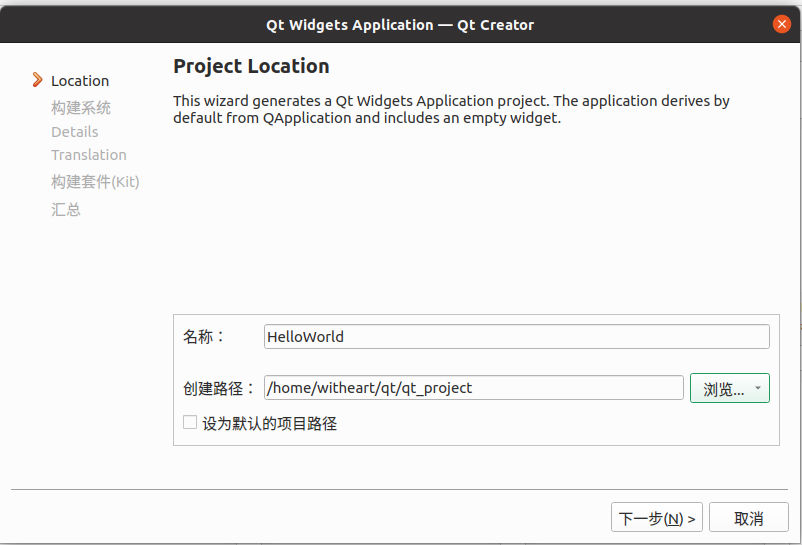
- 配置项目名称与路径
- 构建工具选择 qmake
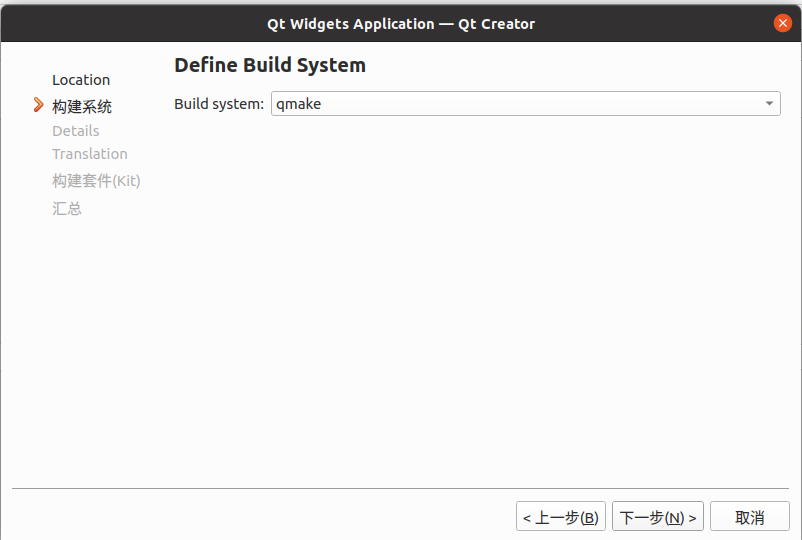
- 保持默认设置继续
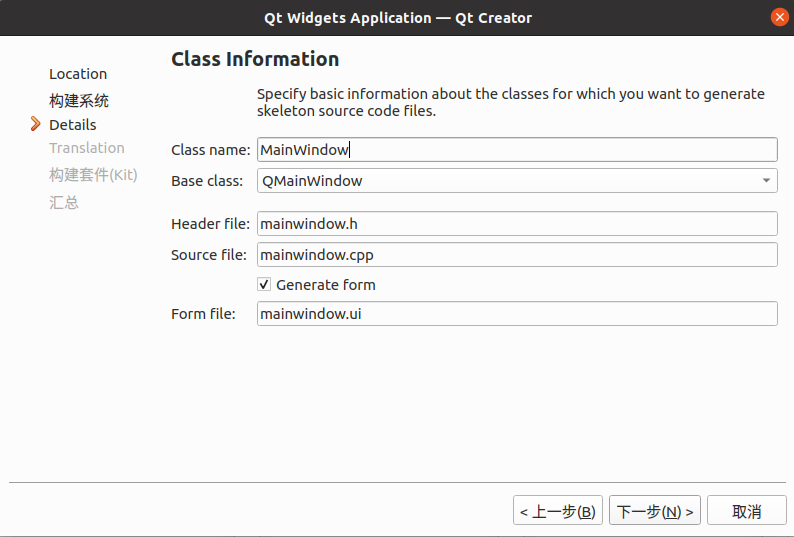
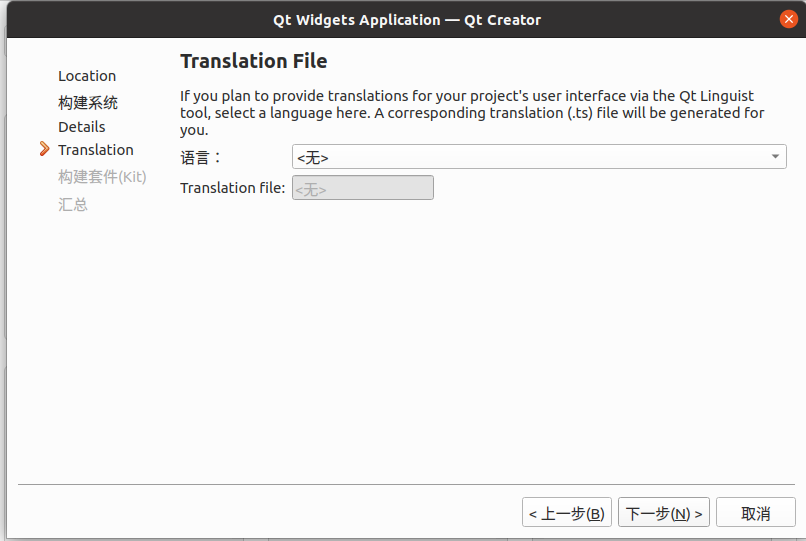
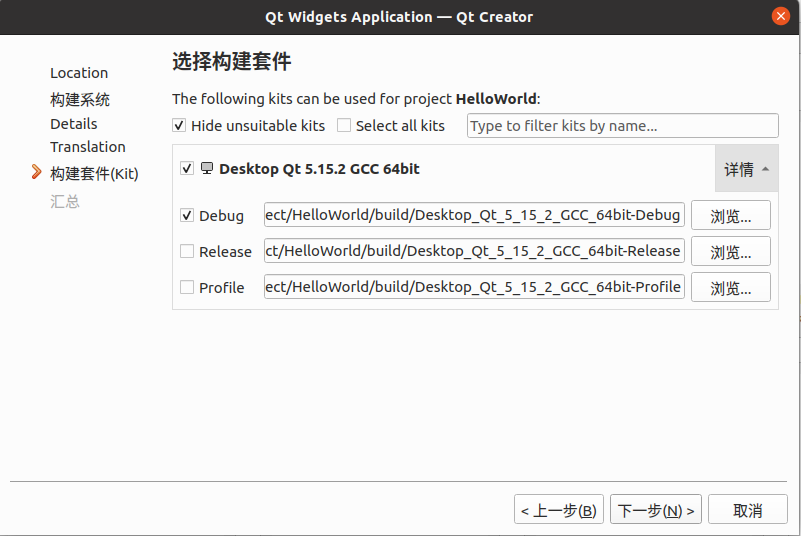
- 选择已配置的交叉编译套件
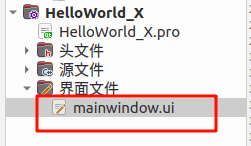
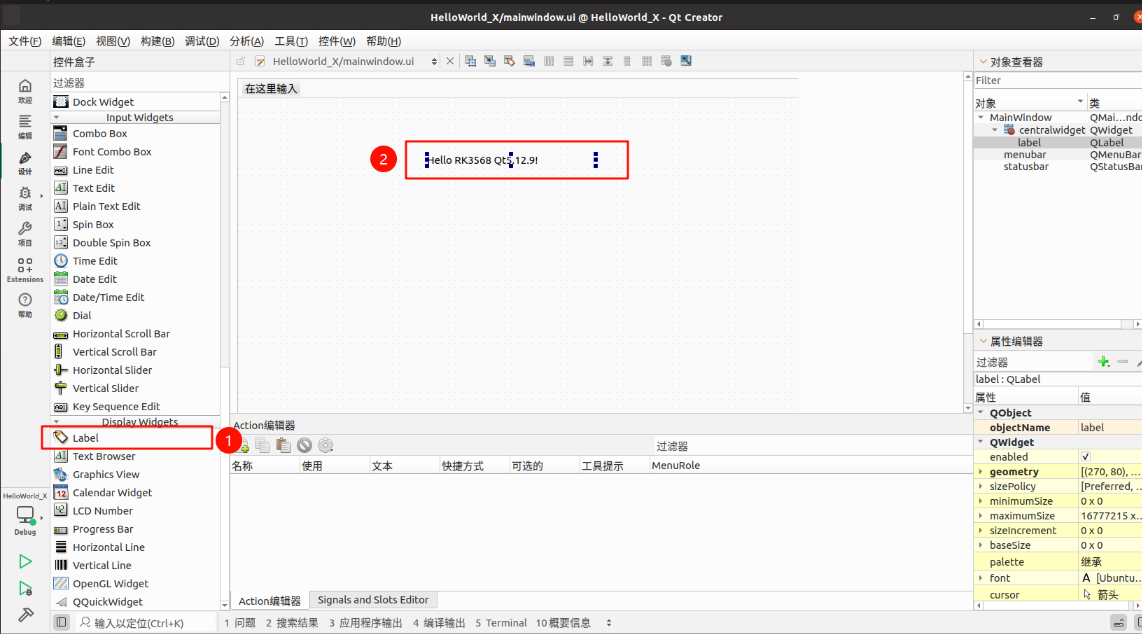
- 项目建立后,打开 mainwindow.ui 添加一个 Label
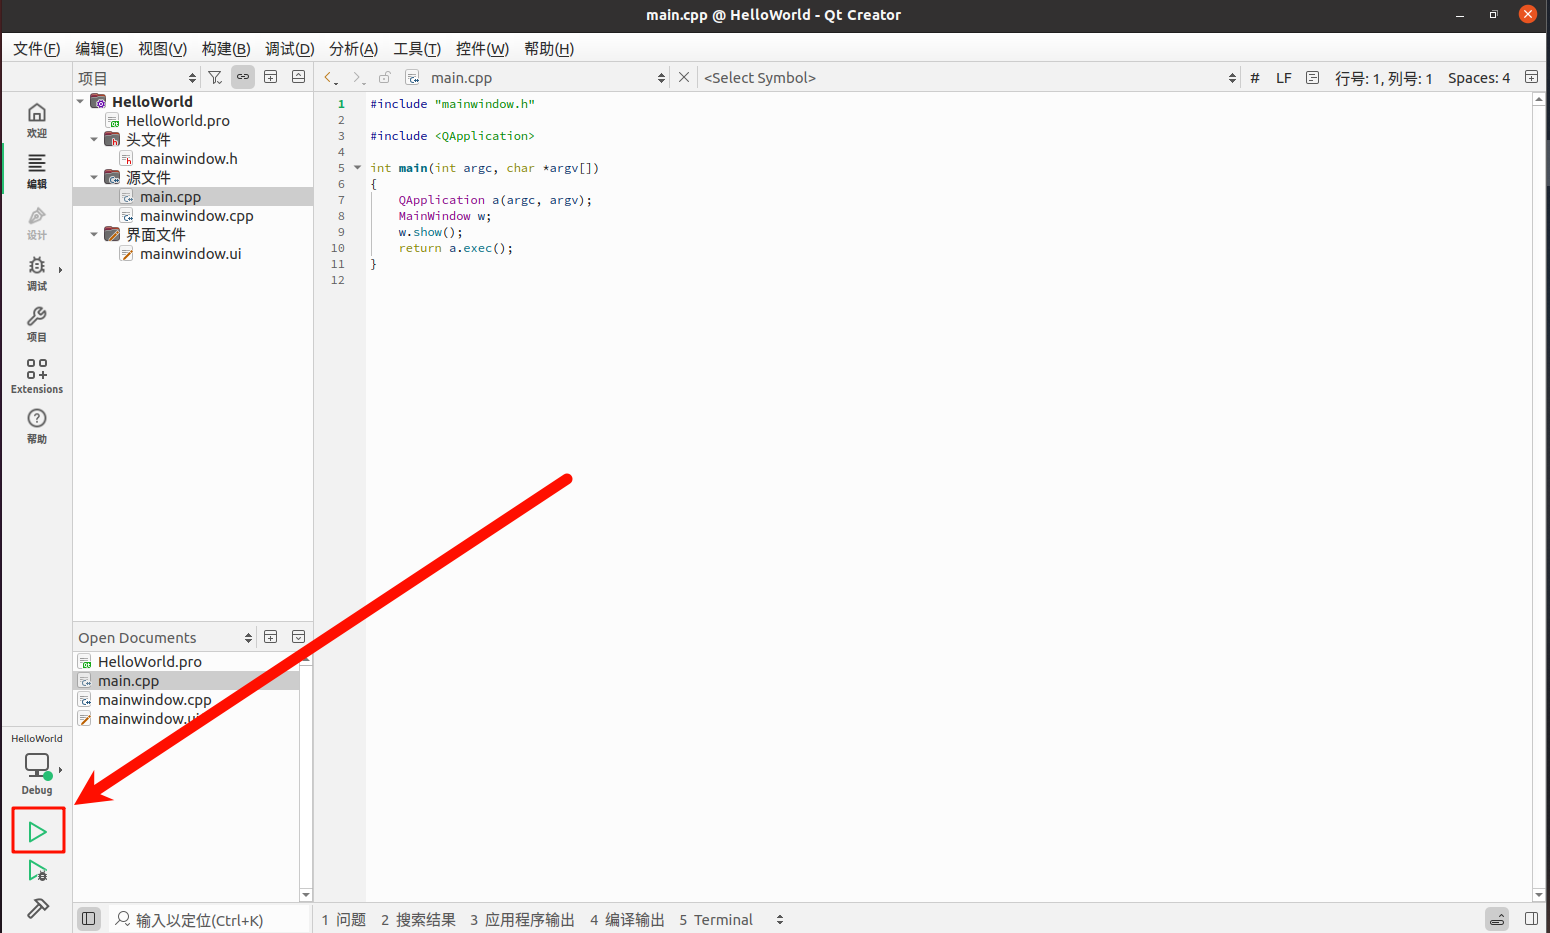
- 点击运行或构建按钮
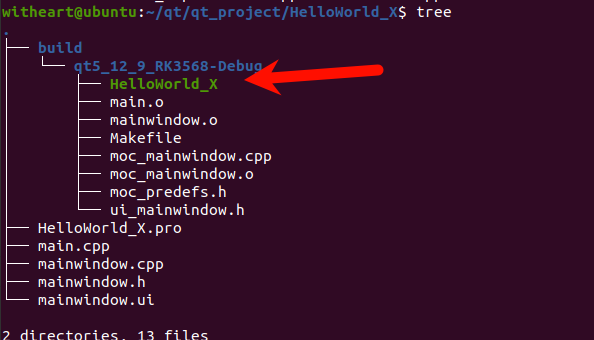
- 查看构建目录的输出程序
将生成的程序复制到目标设备,使用终端运行:
./HelloWorld_X
运行效果:
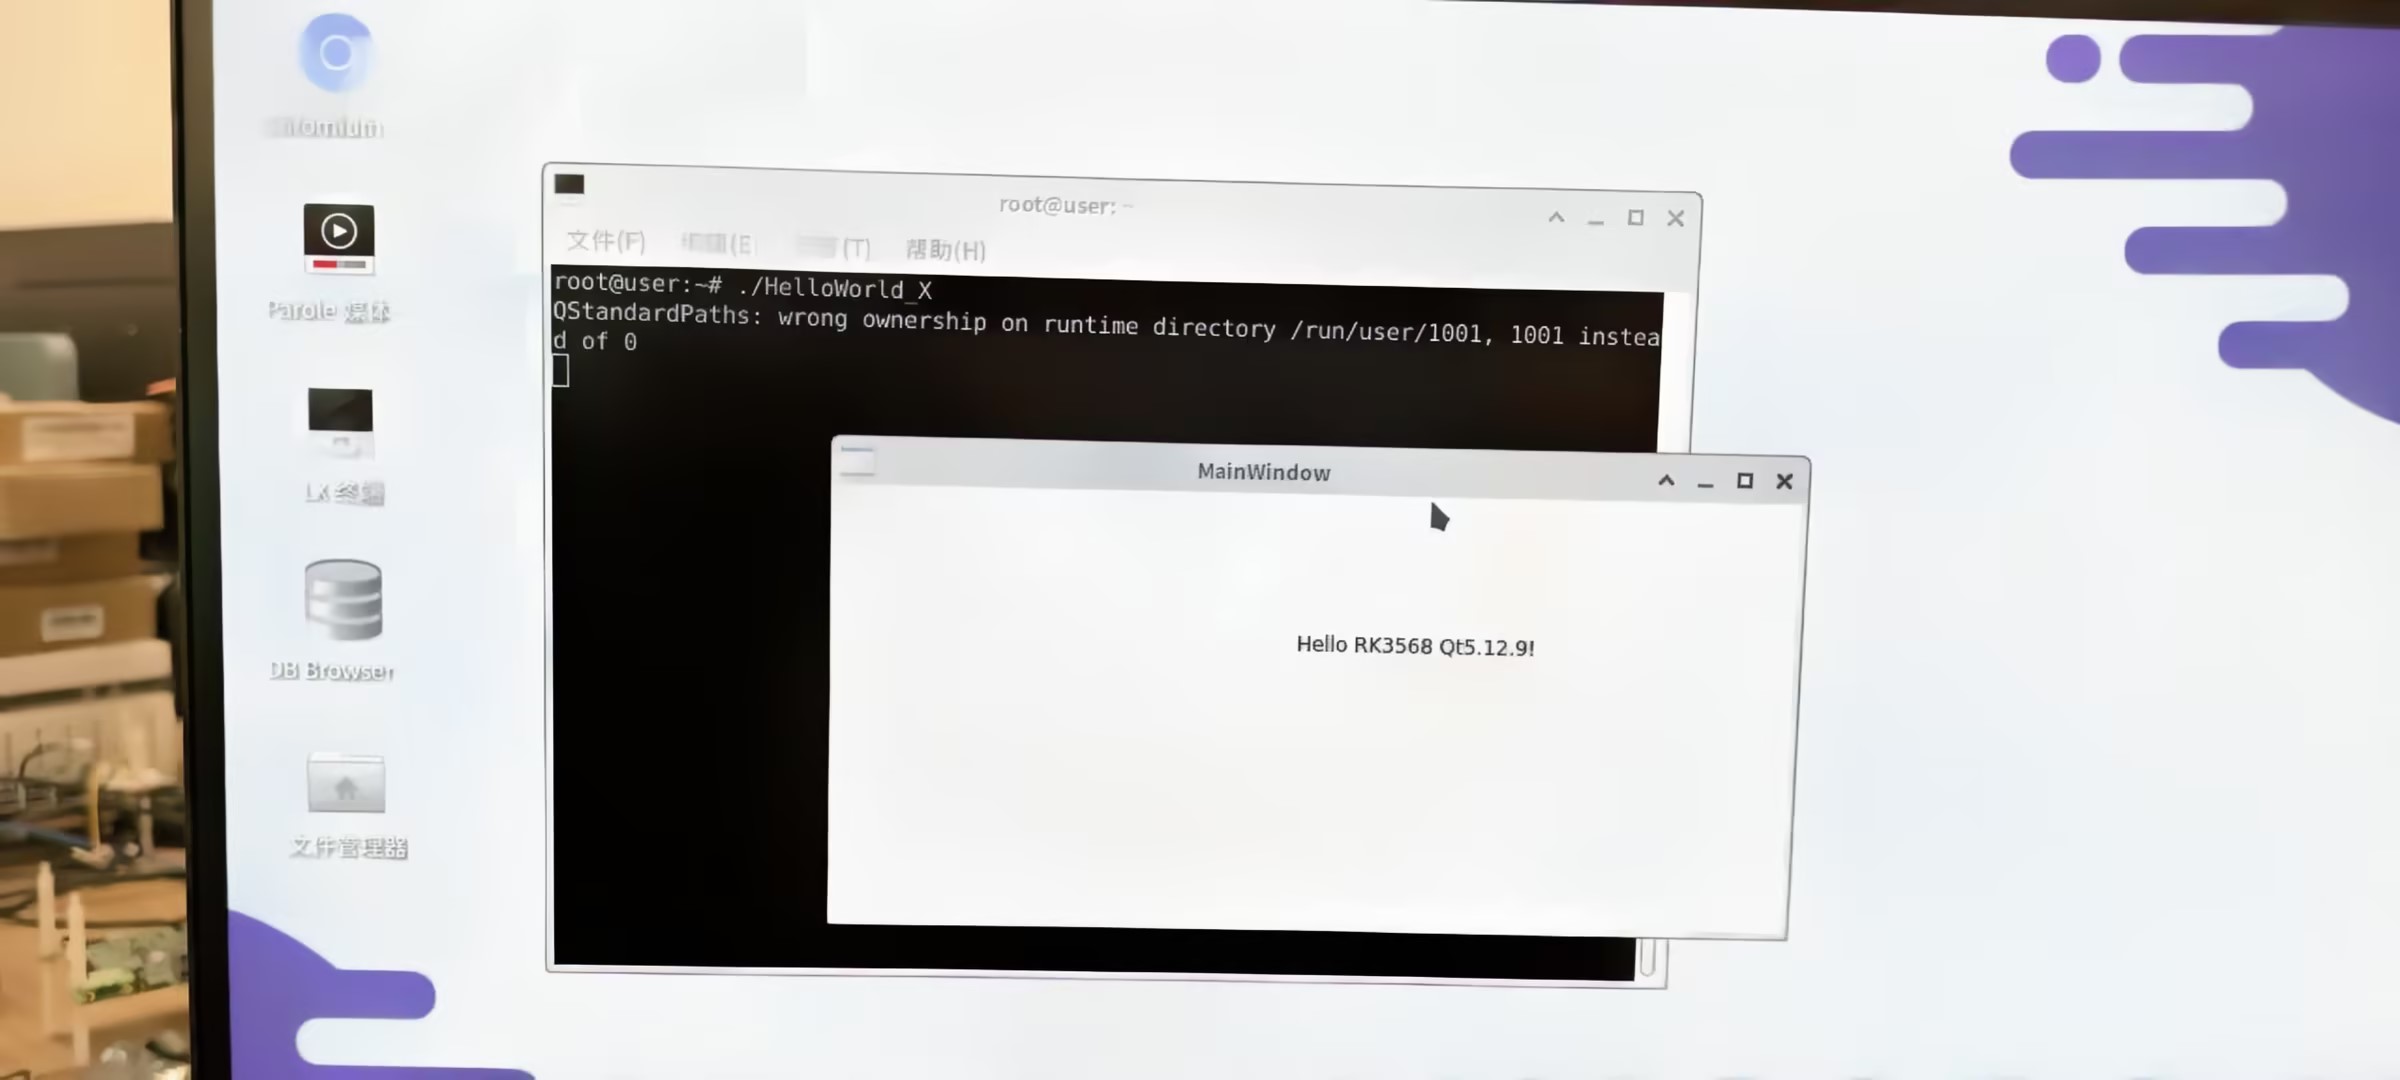
完成!你已成功使用 Qt Creator 在 x86 主机上交叉编译并部署 Qt 程序至 ARM 设备。

留下评论