
Ubuntu Gnome 手动设置DNS并验证是否生效
1 设置方式
按下图方式,将DNS改为
223.5.5.5,119.29.29.29
注意是使用英文逗号分隔的。
1.1 WiFi
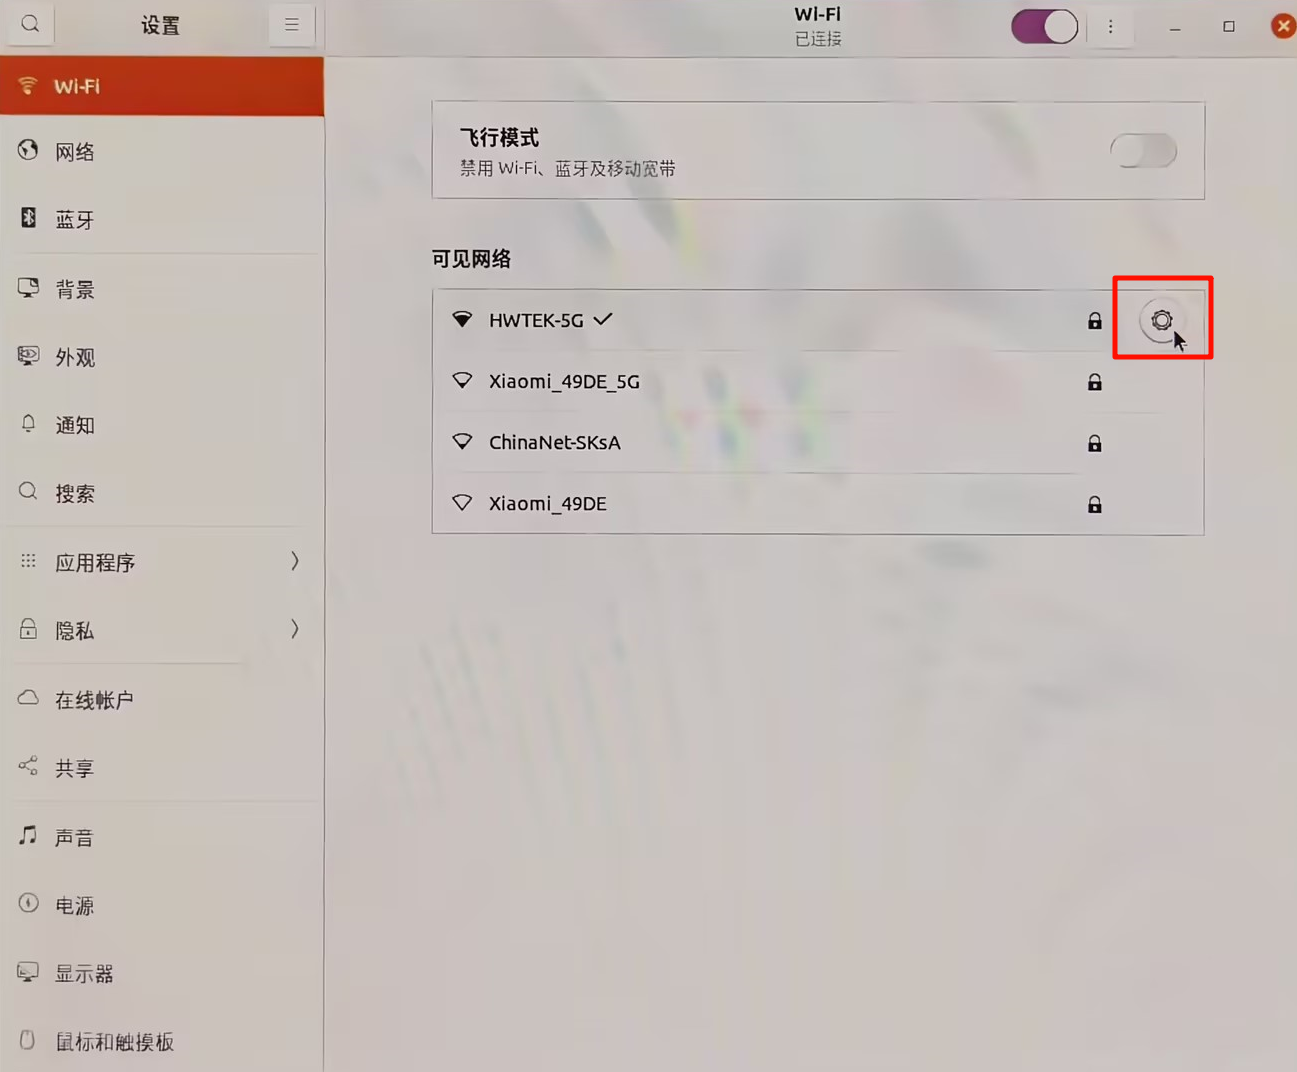
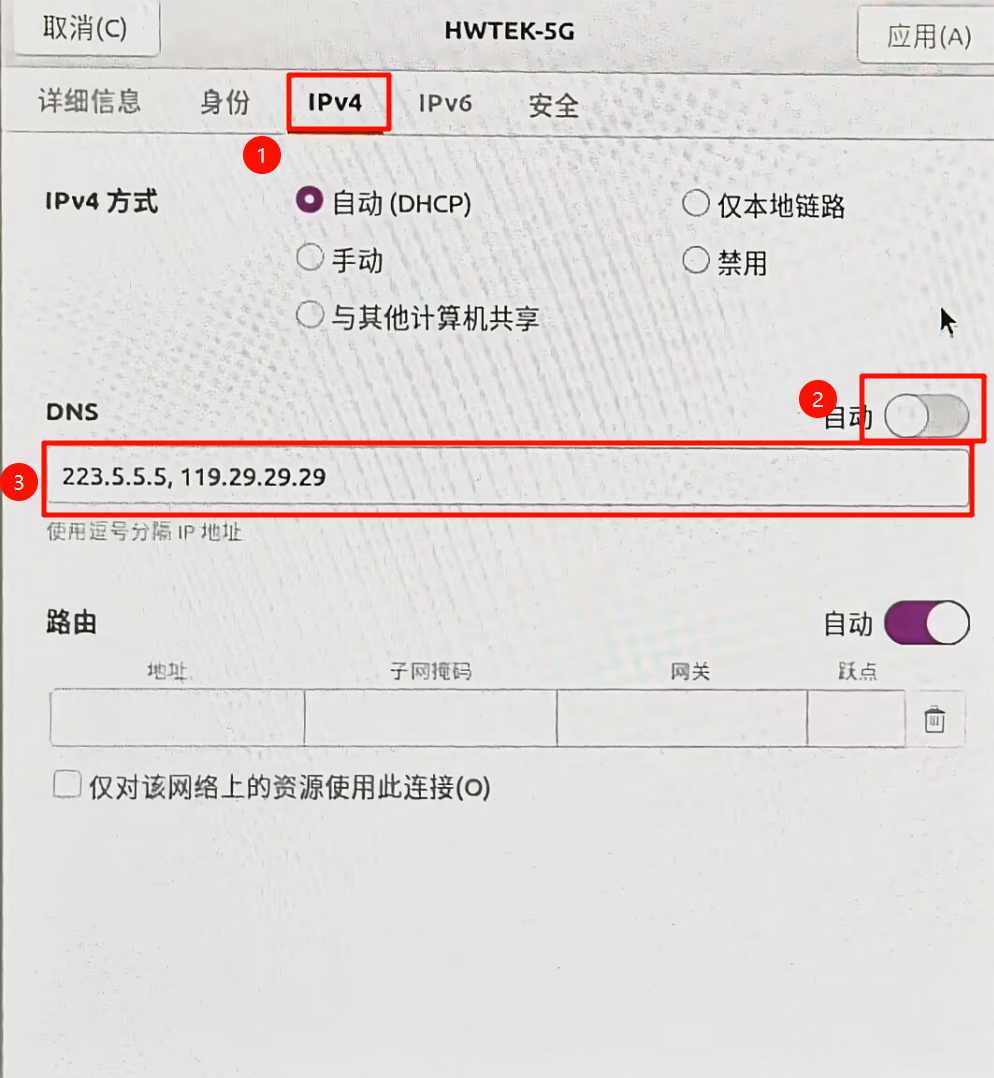
1.2 有线网络
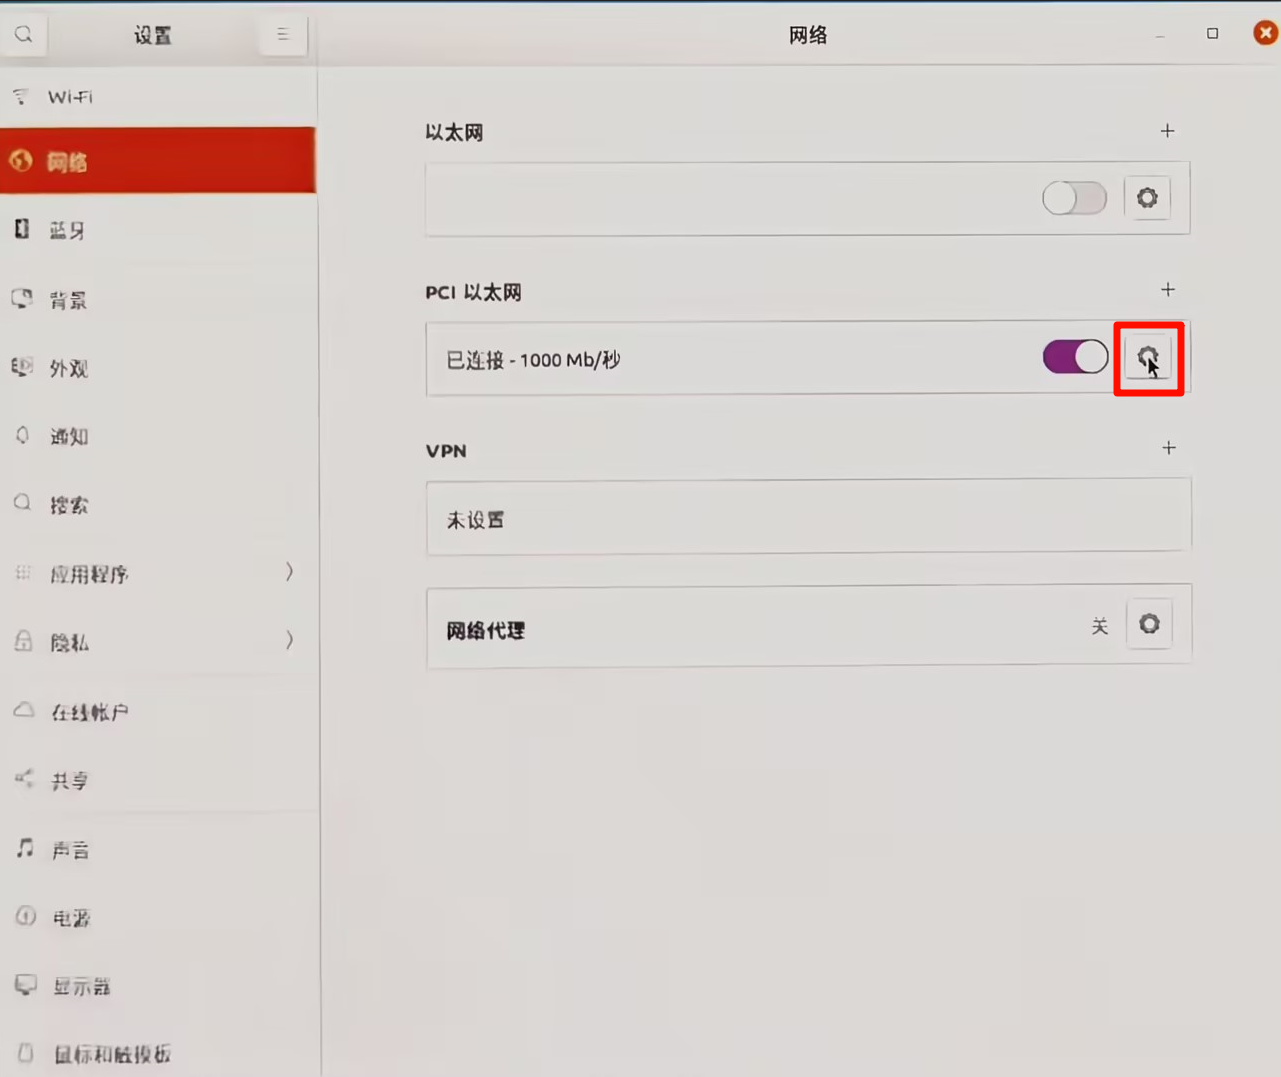
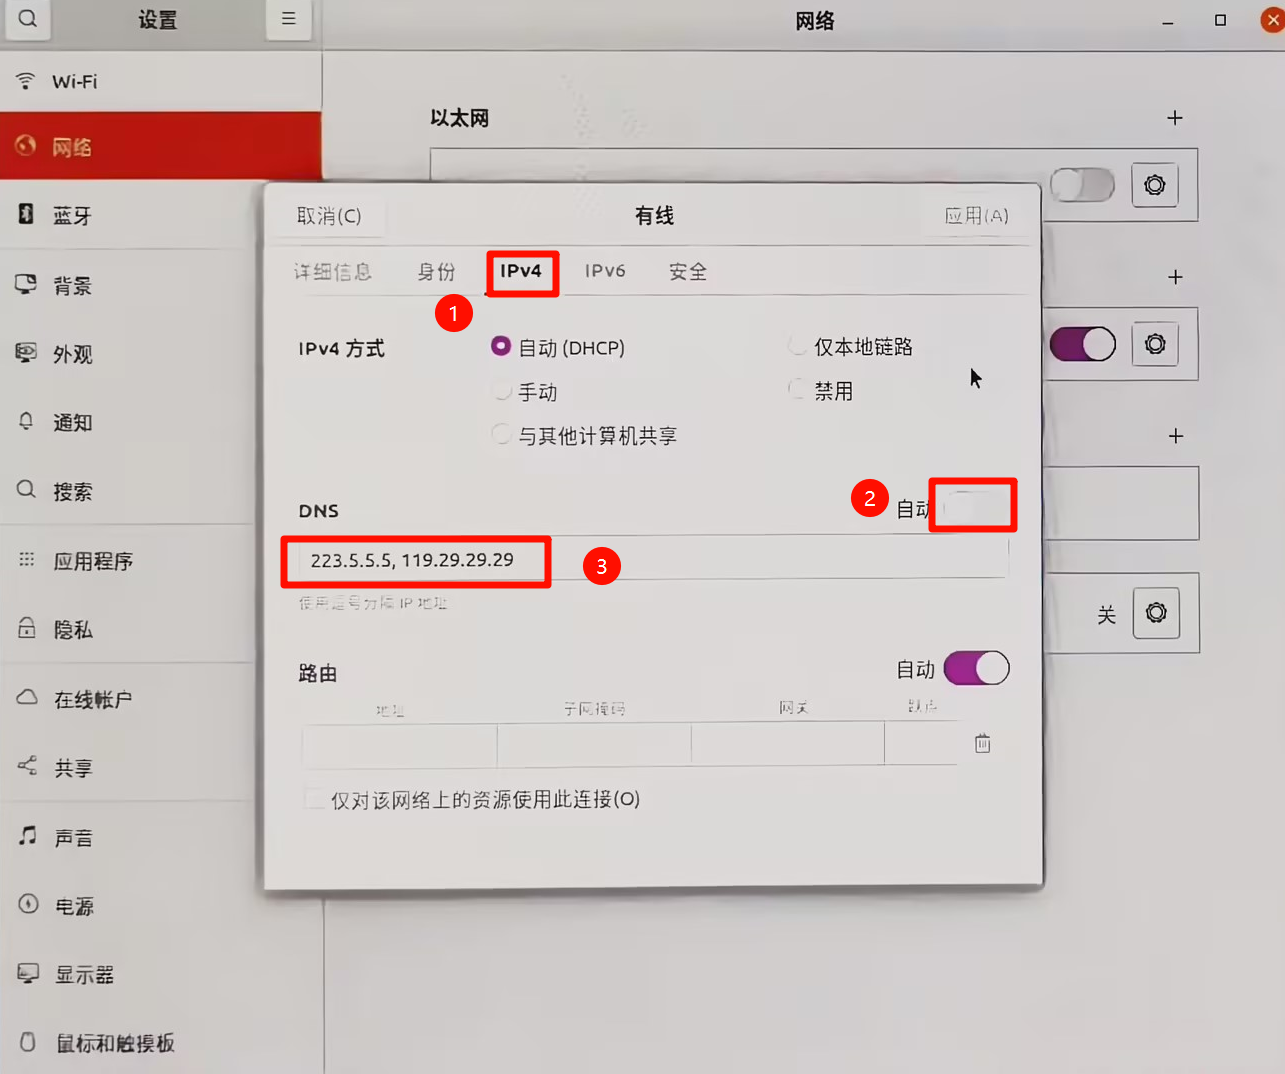
- 设置完成后重启
sudo reboot
验证方式
方式一:
- 使用这个命令
nmcli dev show | grep DNS - 示例输出应该是刚刚设置的内容
IP4.DNS[1]:                             223.5.5.5
IP4.DNS[2]:                             119.29.29.29
IP4.DNS[1]:                             223.5.5.5
IP4.DNS[2]:                             119.29.29.29
方式二:实际抓包
sudo apt update
sudo apt install tcpdump
- 清空DNS缓存
resolvectl flush-caches - 启动一个终端
sudo tcpdump -n -i any port 53 - 启动另一个终端
resolvectl query zhihu.com
此时返回第一个终端,查看数据包流向
tcpdump: verbose output suppressed, use -v or -vv for full protocol decode
listening on any, link-type LINUX_SLL (Linux cooked v1), capture size 262144 bytes
18:52:33.555492 IP 192.168.0.154.35137 > 223.5.5.5.53: 46254+ [1au] A? zhihu.com. (38)
18:52:33.560647 IP 223.5.5.5.53 > 192.168.0.154.35137: 46254 1/0/1 A 182.61.194.9 (54)
可以看到,查询 zhihu.com 的请求发给了阿里 DNS(223.5.5.5)的 53 端口。

留下评论